Pages

Showing posts with label crafty. Show all posts

Friday, September 20, 2013

Cable Car Craft

Last weekend, I broke out a craft for the girls!

We didn't have any actual plans on Saturday, so I figured a little activity would prevent fighting give us something fun to do!

Lest you think that I'm super crafty all on my own, I assure you that I am not.  I got this out of the October 2013 issue of Parents magazine.  


craft with cardboard box

I love that this craft uses pretty much just found items...no need to rush out and buy anything!

You start out with an old cracker box.


Then you cut out a window on both sides.


I wanted to have the girls paint all at the same time, but I could only find 1 brush!  I also decided to let them each use 1 color.  


You can still see some of the print on the boxes through the paint, but that's totally not a big deal.

They each did their painting and then we went on a family hike and resumed the crafting after naps.  

I wanted to make sure that paint was good and dry!

Before we started making them all pretty, I hot glued a straw on top.


You can use any old straw you have.  I just happened to have cute ones that I got as a gift.

For the decorating, I pulled out my washi tape and basic stickers.


I let them use whatever they wanted to use!

Gracie came up with the whole star on a circle thing by herself.


I was quite impressed!

Leah did all the taping and sticking by herself!


Once the decorating was done, we strung yarn through the straw and found a place to run the yarn.

That was the hard part.

I taped yarn to the wall.  That wasn't real sturdy and came off the wall easily.


I tied yarn between two lamps for Leah's.  You can see the lamp on the left.  


That was sturdier than Maggie's.

The best yarn supporters were, far and away, the tall chairs.


Gracie even set up 2 little areas for her Dollar Store Piggy!


That's Piggy's house (made from a Sonic drink tray) on the left, a nice transporting photo in the middle, and the stable on the right.

Or as Gracie said, "The fun place!"

If you want to make your house "the fun place," this weekend, cable car crafts are the way to do it!


I'm linking up with Abbie at Five Days Five Ways!

Friday, September 13, 2013

Chalkboard Chore Chart

Leah was begging for a chore chart all summer.

It probably sounds like I'm making that up, but I'm not.  Promise.

She didn't want a chore chart because of this deep passion for helping around the house; she just wanted to earn money!

Our summer was so crazy and all-over-the-place that I never got around to it.

But, in my determination to have our school year be NOT all-over-the-place, I finally got my act together.  

I present to you...


It swiped the idea from here.

All you need is a piece of wood, chalkboard paint, and some clothespins.  

I've had this piece of wood (that I got from Michael's) for years, so I was glad to finally use it for a project.  Just be sure that whatever wood you use is light weight.  I like that it's long and skinny, but you can use whatever dimensions your little heart desires.

Paint the wood, following the directions that come with the chalkboard paint.  I used the spray paint kind.  

It was a nice combination of my two loves:  chalkboard paint and spray paint!

Then, write the name or initial of each chore participant on the board.


We made our clothespins fancy, but you certainly don't have to!  Seeing as Maggie and Gracie can't read, I used washi tape to decorate the end of each clothespin.  

That way I can tell them to move the flower clothespin or the pink polka dot clothespin...it's a direction they can easily follow!


Leah has 4 clothespins, and she gets paid a nickle per clothespin. 

I keep tally marks of each chore completed, and they will get paid at the end of the month, just like we do!

She doesn't get paid to read for 20 minutes a day.
Once a chore is completed, they move the clothespin from the left to the right!


I also color coordinated the chores to the time of day they are done.

These are all after-supper-chores.


Leah cleans up under the kitchen table with the dustbuster.  Let me tell you, the dustbuster was the best purchase we've made in a long time.  They love it!  If Gracie is getting crabby, I just tell her to dustbust something and she's as happy as can be!

Maggie pushes in the chairs at the table after Leah is done dustbusting, and Gracie has to clear her spot at the table.

Leah and Maggie have to clear their spot, too, but I wanted to have something for Gracie on a clothespin :)

The other chore that all the girls have is setting their clothes out for the next day.  Let me tell you, that is a game changer!

If Leah doesn't have her clothes set out, it can be a 20 minute process.  This chore saves our my sanity!

Oh, and there's this roving clothespin:


They get to watch 1 show from netflix after school, so the I PICK clothespin keeps track of who gets to pick next.  

This prevents fights and whining...2 things I can live without!

I'm going to hot glue some baker's twine on the back to hang it on the wall, but I haven't found a good spot yet.  The nice thing about it being a chalkboard, is that I can easily change the chalkboard from being portrait to landscape, depending on where I hang it!

If you're looking for a cute and easy way to keep track of responsibilities, this is just the thing for you!

I love that it's so easy to customize and switch up!  If I want to add or take away a chore, I just add or take away a clothespin!

Easy peasy :)

Have a great weekend!


I'm linking up with Abbie at Five Days Five Ways!

Thursday, September 5, 2013

Cute and Easy Mason Jar Dispenser

I saw this super cute idea on pinterest a while ago and kind of stored it in my brain.


I didn't actually pin it, so I don't know who to link back to.  I don't intend to be a rude blogger, so if you have seen this before, let me know, and I'd be happy to link to the original idea person.

Because, I assure you, I'm not this creative on my own :)

Moving on...

Besides not remembering who thought of this idea, I have another problem.

I don't like it when I need like a teaspoon of sugar and have to lug out my big sugar container to get it. 

I realize that sentence makes it sound like I have a psychotically huge vat full of sugar, but, I assure you, it's a normal size.  Apparently I just have oddly disproportionate feelings about it :)

My problem is now solved.

And it's cute!

Here's what you need!


Yep, that's just a mason jar, pencil, and the top of a salt container that I hacked off.

You also need a scissors.  Obviously.  Even though it's not in the picture.

Next, trace the seal thing on the top of the salt container.


If I actually canned, I'd probably know what the real name is for that thing.  But, alas...

Then you cut it out.


I know.  It's so easy that you can see why I didn't pin it in the first place.

Sometimes the most basic things are the most brilliant!

Put the newly cut out dispenser top on the top of your mason jar and screw the ring on.


Fill it with whatever your little heart desires!

See how cute it is in my cupboard?


Clearly it's waaaaaay more convenient than that other pesky container.

And significantly more adorable!


I'm linking up with Abbie at Five Days Five Ways!
I'm linking up with Jess!


Friday, August 23, 2013

Shrinky Dinks!

Happy Friday, Friends!

Aaron has been out of town since Wednesday, and he's coming home this afternoon!  We're awfully excited!

He's visiting Southeastern Seminary in North Carolina with a pastor friend to recruit church planters to our area.  It's been fun explaining what church planting is to the girls and see Leah grasp what that is!

We've kept pretty busy, so that's good!  The only bad thing is that I was pouring boiling pasta water out of a pot and accidentally poured some on my fingers (I was making this...SO delicious).  A HUGE blister formed (and recently deflated...ew).  Better me than one of the girls, though, that's for sure!

What's one of the ways we kept busy?  I reached back into my camp counselor days and pulled out some shrinky dinks!  Leah got a shrinky dink kit for Christmas, and I set it aside for a time like this!


The girls had lots of fun!  The kit came with the big paper you see there.  It's full of pictures to trace!


I actually let Gracie use sharpies which surprisingly didn't backfire on me!

I made little game pieces.  I've written before about the drama of choosing game pieces, so I'm thinking having their own personalized game piece might cut down on some of the aforementioned drama.  We shall see :)


Here's the rest of our handiwork!


Leah is going to make her shrinky dinks into zipper tag/backpack decorations.  I might try to seal them so the decorations don't rub off.  

The rest of today will be spent on finishing up birthday party preparations for Gracie's party on Saturday.  It's my goal to have as much done ahead of time as possible!  

I'm excited for what I have planned for the blog next week!  Gracie's birthday post will be up on Monday, and the rest of the week will be all about back to school! 

I'm writing about:

  • why I'm happy to send our girls to our public school.
  • how to develop a good relationship with your child's teacher.
  • 4 easy and balanced after school snacks.
  • LICE!!!  Treatment and prevention.  Yeah, we had it.  Yeah, it was awful.  Let me help you :)

Be sure to stop back next week!

Oh, if you have some time, check out this online conversation I had with Moriah!  And please ignore how weird my eyes look :)

Happy weekend!

Wednesday, August 14, 2013

Super Cute Beach Ball Garland

I happened upon this idea a few weeks ago and thought it was perfect for coloring things up a bit!


Here's what you need!


I thought it might be okay to use a glue stick for this, but I wouldn't.  Totally use the double sided tape.

My mom gave me a 1 inch hole punch a while ago, so I used that to cut out the circles.  These would be cute with circles that are a little bit bigger, too...maybe 1 and 1/2 inch.

Here's what to do using the magic of pictures :)


See...super easy!  (On a side note, I took those pictures on a pillow without a case :))

Leah could totally do it!


You just repeat the steps over and over again until you have as many as you want!


This would be an easy and fun way to infuse the color theme for a party.  Plus, I think this garland would make for some fun layering with other garlands!


It would also be super fun to make with glittery paper to spruce up a mantle around Christmas time!


You can move the little beach balls around on the string so you can easily adjust the spacing.  

I'm a fan of that kind of flexibility!

Give this a try and add a little fun to your space!

Wednesday, July 17, 2013

Ribbon Wand

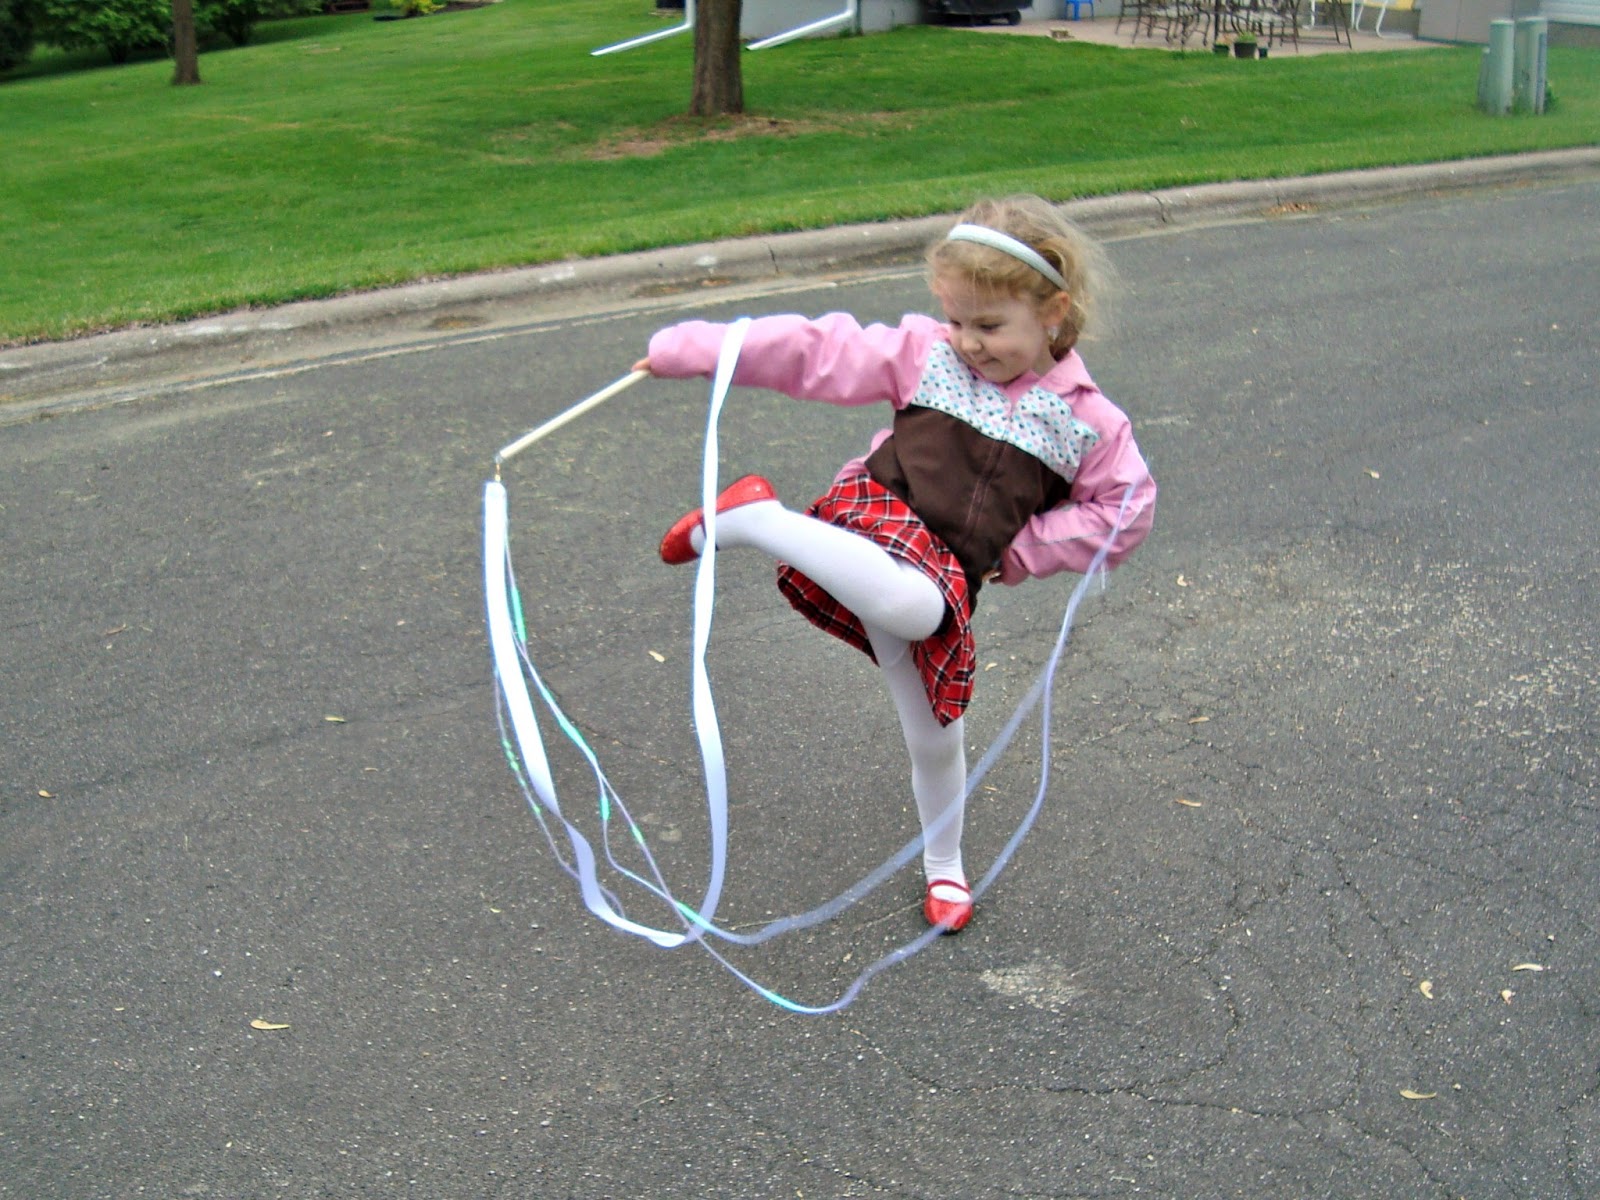
Ribbon Wands are the best!  And you can make your own all easy peasy.


You'll probably have to run to Walmart for some of the stuff, but this is an easy, no sew project.


You need:

Ribbon 
12 inch wooden dowels (I think they are 1/2 inch)
Swivel/spinner things for fishing
Eye hooks (I got mine out of a little photo hanging kit)
Needle Nose Pliers
Optional: washi tape (or markers or paint) to decorate the dowel/handle

Not pictured:  hot glue gun and lighter

I bought a 36 inch dowel and cut it into thirds.  I sanded the ends to make sure there wasn't any sliver potential.

For starters, screw the eye hook into the end of your dowel.  You can use the needle nose pliers to get it started.


And then you should be able to screw it all the way in by just using your hand.


Next, use the needle nose pliers to open up the eye of the eye hook.


Put the circle end of spinner thing into the eye hook and close with the needle nose pliers.


The ribbon part is up next.

Cut your ribbon however long you want it.  I cut ours 6 feet long.  Use a lighter to heat seal the ends.

Fold over the end of the ribbon and hot glue to leave a loop.


Once the hot glue is dried (which takes all of 30 seconds) clip the loop onto the spinner thing.


And you're done!  Unless you want to decorate the handle.  We used washi tape, but you can do whatever you want.  Or you can do nothing.  This is a free country, after all ;)


I let the girls choose what tape they wanted to use and I put it on.  


There was a lot less crying that way...from all of us!

See how much fun it is to twirl around with a ribbon wand!


So, about my insistence that you don't use sequins on a string.  I thought it would be pretty to have sequins twirling around, which I was right about.  It was lovely.


What I didn't account for was that it would get tangled every 5 seconds.


It also really hurt if your sister's ribbon accidentally whacked you.

Both of those factors lead to crying.  

Worst decision I've made since I put a remote control car in my hair and thought it would get untangled if I put it in reverse.

I do have to sometimes take these away from the girls when they "poof" each other like Abby from Abby's Flying Fairy School on Sesame Street.  They aren't actually touching each other when they are poofing, but sometimes a girl just doesn't want to get poofed and her sister isn't respectful of that.

Can you even believe the silliness of some of the things we have to address as parents?  I never thought I'd have to say, "Don't poof your sister!"

Anyway, poofing aside, these are an easy and fun way to make any day special.  I think they would make a fun party favor for a little girl's birthday party!


Have a happy day!

I learned how to make ribbon wands from this tutorial.

Linking up with Abbie on Five Days Five Ways!