Oh, friends, it's been a week...a good week! But, a busy week nonetheless.
I didn't post yesterday because doing so would have stressed me out.
And I don't want blogging to stress me out!
So, I'm back...the world can go on turning ;)
Anyway, here's an activity that isn't rocket science.
Is rocket science even fun?
Maybe it is...to rocket scientists, but I'm not that smart.
I feel like making forts is so obvious that it almost doesn't even count as an activity idea.
But, here's the thing. Sometimes I get all perfectionist-y with stuff like this.
I think that the fort has to have like different rooms,
a heating and cooling system,
indoor plumbing,
and a pantry.
When all you really need is a couple of chairs and a blanket/quilt.
A little room service never hurt, either!
Have a great weekend!
Showing posts with label Because Summer Should Be Fun. Show all posts
Friday, July 26, 2013
Wednesday, July 24, 2013
Easy Ice Cream Sandwich Cake
Edited June 13th: When I posted this last summer, I totally thought of Shay, because there are endless ways to Mix and Match this recipe! You can use any ice cream topping or candy bits that your little heart desires! Happy Summer!
Here's a perfect and easy summer dessert that doesn't heat up your kitchen.
Plus, your kids can make it for you!
That's a win-win in my book!
You need really basic stuff, and it's easily customize-able!
That math equation in the picture above?
That's my kind of math...easy and yummy :)
You can use any kind of topping and candy bits. You could even get wild and use the Neapolitan ice cream sandwiches. The sky's the limit here :)
You start out by laying ice cream sandwiches in the bottom of a 9x13 inch pan.
Spread the (room temperature) caramel on top of the ice cream sandwiches.
Please note that Leah is wearing her pajamas. This comes into play later :)
Then, spread a thin layer of Cool Whip on top.
I used light Cool Whip, because it makes this dessert healthy.
hee hee hee :)
Put on the next layer of ice cream sandwiches.
Cover the whole bottom layer.
Spread a thicker layer of Cool Whip on the top.
Oh, did you notice that Leah is now wearing something other than pajamas?
That's because we had to run to the store.
I had bought 2 boxes of 12 ice cream sandwiches from Aldi, but when I opened the boxes, 1 had 8 and the other had 9.
Weird.
You use 19 ice cream sandwiches in this recipe, so I didn't have enough to finish.
We ran to Aldi and they gave us another box for free.
What Aldi lacks in their counting ability, they make up for in the customer service department :)
Anyway, sprinkle the heath bits on top.
I put the heath bits in the little cup so that it would be easier for the girls to sprinkle.
Here it is in its completed glory!
Oh, I forgot to mention that I drizzled a little bit of chocolate syrup on just for kicks.
After the "cake" is finished, pop it in the freezer for 45 minutes or so to firm up. You should cover it in plastic wrap (after you serve it the first time) to keep it from getting freezer burn...press it onto the exposed parts.
That sounds weird, but I think you know what I mean :)
This is such an easy recipe...the hardest part was keeping the girls from licking the spatula as they were cooking!
Slice and enjoy your children's hard work!
I'm linking up with Abbie at Five Days Five Ways!
Here's a perfect and easy summer dessert that doesn't heat up your kitchen.
Plus, your kids can make it for you!
That's a win-win in my book!
You need really basic stuff, and it's easily customize-able!
That math equation in the picture above?
That's my kind of math...easy and yummy :)
You can use any kind of topping and candy bits. You could even get wild and use the Neapolitan ice cream sandwiches. The sky's the limit here :)
You start out by laying ice cream sandwiches in the bottom of a 9x13 inch pan.
Spread the (room temperature) caramel on top of the ice cream sandwiches.
Please note that Leah is wearing her pajamas. This comes into play later :)
Then, spread a thin layer of Cool Whip on top.
I used light Cool Whip, because it makes this dessert healthy.
hee hee hee :)
Put on the next layer of ice cream sandwiches.
Cover the whole bottom layer.
Spread a thicker layer of Cool Whip on the top.
Oh, did you notice that Leah is now wearing something other than pajamas?
That's because we had to run to the store.
I had bought 2 boxes of 12 ice cream sandwiches from Aldi, but when I opened the boxes, 1 had 8 and the other had 9.
Weird.
You use 19 ice cream sandwiches in this recipe, so I didn't have enough to finish.
We ran to Aldi and they gave us another box for free.
What Aldi lacks in their counting ability, they make up for in the customer service department :)
Anyway, sprinkle the heath bits on top.
I put the heath bits in the little cup so that it would be easier for the girls to sprinkle.
Here it is in its completed glory!
Oh, I forgot to mention that I drizzled a little bit of chocolate syrup on just for kicks.
After the "cake" is finished, pop it in the freezer for 45 minutes or so to firm up. You should cover it in plastic wrap (after you serve it the first time) to keep it from getting freezer burn...press it onto the exposed parts.
That sounds weird, but I think you know what I mean :)
This is such an easy recipe...the hardest part was keeping the girls from licking the spatula as they were cooking!
Slice and enjoy your children's hard work!
I'm linking up with Abbie at Five Days Five Ways!
Friday, July 19, 2013
Easiest Popsicles
Popsicles are a quintessential summer treat! And they're even a little bit more special when you let your kids make them!
You only need a few things:
1 box Jello
1 packet Kool-Aid
1 and 1/4 cups sugar
You can use any flavors of jello and kool-aid that you think sound good together. I chose peach jello and peach mango kool-aid.
I'd just make sure that the colors wouldn't blend together to make brown.
Nobody wants a creepy brown popsicle.
Aaaaaanyway, put the sugar and kool-aid
and jello in a freezer ziplock.
Shake the bag to combine the ingredients.
FYI, 2 year olds are really great at shaking things.
Shaker extraordinaires, if you will.
The nice thing about this recipe is that you can just make a small batch of popsicles at a time and can easily save the mix to use another time. Or, do the math to make more popsicles!
To make 6 popsicles, combine 6 tablespoons of powdered mix with 3/4 cup of boiling water. Stir to be sure the powder is dissolved. I did this part, so that Gracie didn't risk getting burned. Then, add 3/4 cup of cold water. Stir to combine.
Pour the liquid mixture into popsicle molds.
Freeze until hard and enjoy your tasty work!
And you can let your sisters enjoy the fruit of your labors!
I love how Leah is being all stoic (she was making that face to be silly) and Maggie can't help but giggle :)
Enjoy your weekend! We are headed to a wedding on Saturday...should be fun!
If you don't have a wedding on Saturday, I bet you could make popsicles ;)
You only need a few things:
1 box Jello
1 packet Kool-Aid
1 and 1/4 cups sugar
You can use any flavors of jello and kool-aid that you think sound good together. I chose peach jello and peach mango kool-aid.
I'd just make sure that the colors wouldn't blend together to make brown.
Nobody wants a creepy brown popsicle.
Aaaaaanyway, put the sugar and kool-aid
and jello in a freezer ziplock.
Shake the bag to combine the ingredients.
FYI, 2 year olds are really great at shaking things.
Shaker extraordinaires, if you will.
The nice thing about this recipe is that you can just make a small batch of popsicles at a time and can easily save the mix to use another time. Or, do the math to make more popsicles!
To make 6 popsicles, combine 6 tablespoons of powdered mix with 3/4 cup of boiling water. Stir to be sure the powder is dissolved. I did this part, so that Gracie didn't risk getting burned. Then, add 3/4 cup of cold water. Stir to combine.
Pour the liquid mixture into popsicle molds.
Freeze until hard and enjoy your tasty work!
I love how Leah is being all stoic (she was making that face to be silly) and Maggie can't help but giggle :)
Enjoy your weekend! We are headed to a wedding on Saturday...should be fun!
If you don't have a wedding on Saturday, I bet you could make popsicles ;)
Thursday, July 18, 2013
Do Something a Little Different
It's been hotter than sin around these parts lately.
I mean, hot hot hot.
So hot that I actually went down the water slide at the pool last night.
3 times.
Anyway, we didn't go outside yesterday, because it was stifling. It was kind of like a rainy day, but without the rain, you know?!
Moving on...
We have a "little kitchen" in our kitchen.
It is usually piled high with clutter. Aaron cleaned much of it off the other night.
The girls always want to move the little kitchen so they can use the window as a drive thru. Usually I panic at the thought of all of the stuff falling off the top. So, with the top being easy to clear off, I, well, cleared it off!
I pushed the kitchen table up against the wall and moved the little kitchen into the middle of the kitchen so the girls could use both sides.
They loved it!
Plus, I brought a big outside toy into the living room!
The little store usually stays in the garage. We'll probably put it in the basement when the weather gets cold and we reclaim the garage for the minivan instead of having it full of bikes and summer-y things.
The girls had quite the little set up going with a store and a restaurant.
I got to be the customer a lot which was very fun. The girls are really cute when they act all professional :)
The one downside is that this is what the kitchen looked like when Aaron came home for lunch!
You can't tell very well in the above picture, but the girls each have a bed set up in the kitchen, too.
This one is Gracie's.
It actually looks quite cozy there with the dolls and stuffed animals and...drum?
So, yeah, the kitchen was pretty much out of control.
Aaron loved seeing how much fun we were having and suggested that we have a lunch picnic in the living room.
We were happy to comply!
Every now and then it's a good idea to mix things up a bit!
I'm sure glad that we did!
I mean, hot hot hot.
So hot that I actually went down the water slide at the pool last night.
3 times.
Anyway, we didn't go outside yesterday, because it was stifling. It was kind of like a rainy day, but without the rain, you know?!
Moving on...
We have a "little kitchen" in our kitchen.
It is usually piled high with clutter. Aaron cleaned much of it off the other night.
The girls always want to move the little kitchen so they can use the window as a drive thru. Usually I panic at the thought of all of the stuff falling off the top. So, with the top being easy to clear off, I, well, cleared it off!
I pushed the kitchen table up against the wall and moved the little kitchen into the middle of the kitchen so the girls could use both sides.
They loved it!
Plus, I brought a big outside toy into the living room!
The little store usually stays in the garage. We'll probably put it in the basement when the weather gets cold and we reclaim the garage for the minivan instead of having it full of bikes and summer-y things.
The girls had quite the little set up going with a store and a restaurant.
I got to be the customer a lot which was very fun. The girls are really cute when they act all professional :)
The one downside is that this is what the kitchen looked like when Aaron came home for lunch!
You can't tell very well in the above picture, but the girls each have a bed set up in the kitchen, too.
This one is Gracie's.
It actually looks quite cozy there with the dolls and stuffed animals and...drum?
So, yeah, the kitchen was pretty much out of control.
Aaron loved seeing how much fun we were having and suggested that we have a lunch picnic in the living room.
We were happy to comply!
Every now and then it's a good idea to mix things up a bit!
I'm sure glad that we did!
Wednesday, July 17, 2013
Ribbon Wand
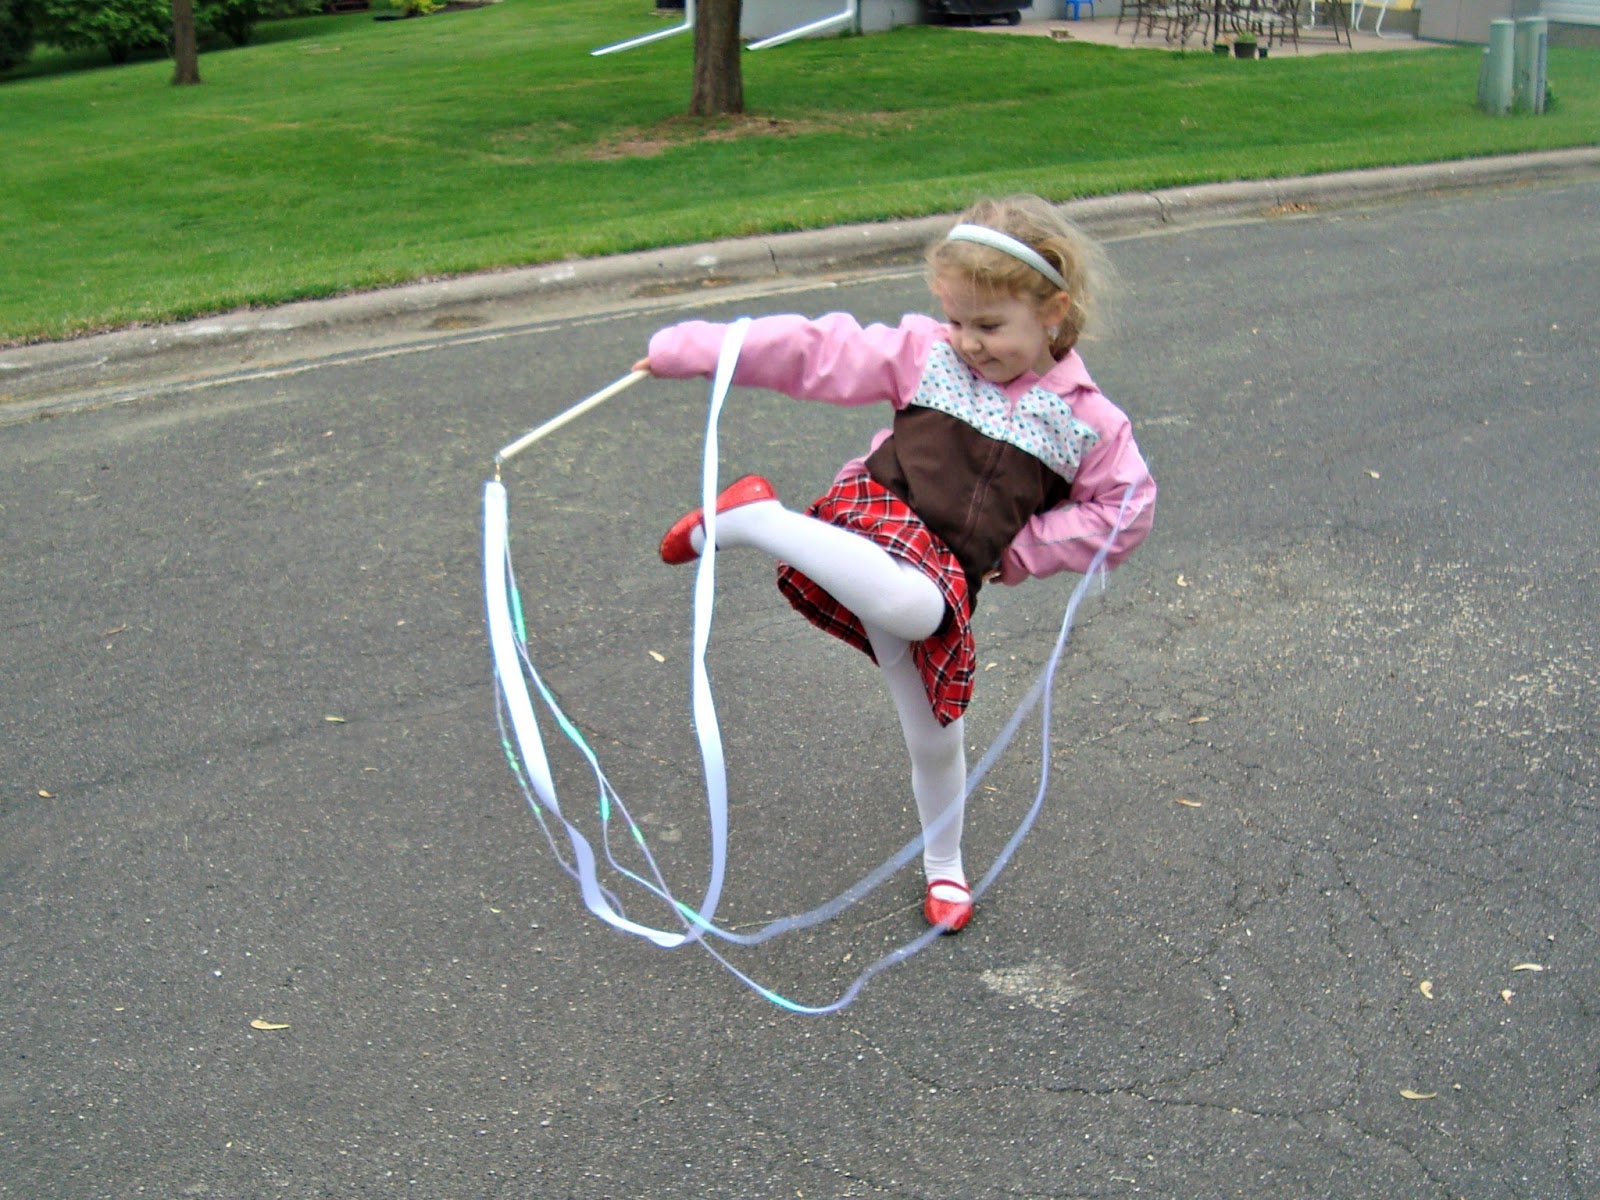
Ribbon Wands are the best! And you can make your own all easy peasy.
There was a lot less crying that way...from all of us!
See how much fun it is to twirl around with a ribbon wand!
So, about my insistence that you don't use sequins on a string. I thought it would be pretty to have sequins twirling around, which I was right about. It was lovely.
What I didn't account for was that it would get tangled every 5 seconds.
It also really hurt if your sister's ribbon accidentally whacked you.
Both of those factors lead to crying.
Worst decision I've made since I put a remote control car in my hair and thought it would get untangled if I put it in reverse.
I do have to sometimes take these away from the girls when they "poof" each other like Abby from Abby's Flying Fairy School on Sesame Street. They aren't actually touching each other when they are poofing, but sometimes a girl just doesn't want to get poofed and her sister isn't respectful of that.
Can you even believe the silliness of some of the things we have to address as parents? I never thought I'd have to say, "Don't poof your sister!"
Anyway, poofing aside, these are an easy and fun way to make any day special. I think they would make a fun party favor for a little girl's birthday party!
Have a happy day!
I learned how to make ribbon wands from this tutorial.
Linking up with Abbie on Five Days Five Ways!
You'll probably have to run to Walmart for some of the stuff, but this is an easy, no sew project.
You need:
Ribbon
12 inch wooden dowels (I think they are 1/2 inch)
Swivel/spinner things for fishing
Eye hooks (I got mine out of a little photo hanging kit)
Needle Nose Pliers
Optional: washi tape (or markers or paint) to decorate the dowel/handle
Not pictured: hot glue gun and lighter
I bought a 36 inch dowel and cut it into thirds. I sanded the ends to make sure there wasn't any sliver potential.
For starters, screw the eye hook into the end of your dowel. You can use the needle nose pliers to get it started.
And then you should be able to screw it all the way in by just using your hand.
Next, use the needle nose pliers to open up the eye of the eye hook.
Put the circle end of spinner thing into the eye hook and close with the needle nose pliers.
The ribbon part is up next.
Cut your ribbon however long you want it. I cut ours 6 feet long. Use a lighter to heat seal the ends.
Fold over the end of the ribbon and hot glue to leave a loop.
Once the hot glue is dried (which takes all of 30 seconds) clip the loop onto the spinner thing.
And you're done! Unless you want to decorate the handle. We used washi tape, but you can do whatever you want. Or you can do nothing. This is a free country, after all ;)
I let the girls choose what tape they wanted to use and I put it on.
See how much fun it is to twirl around with a ribbon wand!
So, about my insistence that you don't use sequins on a string. I thought it would be pretty to have sequins twirling around, which I was right about. It was lovely.
What I didn't account for was that it would get tangled every 5 seconds.
It also really hurt if your sister's ribbon accidentally whacked you.
Both of those factors lead to crying.
Worst decision I've made since I put a remote control car in my hair and thought it would get untangled if I put it in reverse.
I do have to sometimes take these away from the girls when they "poof" each other like Abby from Abby's Flying Fairy School on Sesame Street. They aren't actually touching each other when they are poofing, but sometimes a girl just doesn't want to get poofed and her sister isn't respectful of that.
Can you even believe the silliness of some of the things we have to address as parents? I never thought I'd have to say, "Don't poof your sister!"
Anyway, poofing aside, these are an easy and fun way to make any day special. I think they would make a fun party favor for a little girl's birthday party!
Have a happy day!
I learned how to make ribbon wands from this tutorial.
Linking up with Abbie on Five Days Five Ways!
Friday, July 12, 2013
Simply Splashy
My parents have a pool.
Leah love love double loves the pool!
Maggie and Gracie like to look at it...maybe dip their feet in.
But actually swimming in it?
Let's not get crazy here, folks. That isn't happening.
What do they love the most?
Playing in buckets and baby bathtubs full of water on the deck next to the actual pool, of course!
Enter our little activity.
Ah, yes, Simply Splashy! The alliteration nerd in me feels really happy about that :)
I glanced at a pin a while ago that had this general activity idea in it, so if you've seen it before, let me know and I'd be happy to give them credit!
All you need is a pan or a tub or something to hold water and a die.
On a side note, do you like my ghetto pan? I think this pan predates me actually knowing Aaron.
Moving on...I used a die that had colors on it: 3 sides are green, 2 sides are yellow, and 1 side is red.
I got it from this game:
You can certainly use a regular die.
Are you ready for the really intense directions? You'd better write this down ;)
Have the children gather around the pan of water.
Then take turns shaking the die. When a green side comes up (or whatever your predetermined number(s) is), the person who shook it gets to splash themselves with the water in the pan for 10 seconds.
They can even get wild!
You go girl! Pour that water all over yourself!
Once this game got old, we pulled out a bunch of Pretty Ponies, and they washed the living daylights out of them!
They were playing SO nicely,
that I took a few minutes to read!
You need to know how much I love John Grisham books.
I love them like bees love honey.
I love them like little girls love sparkles.
I love them like mommies love nap time.
So, yeah, that's a lot!
Anyway, Leah enjoyed splashing the bubbles around and giving herself bubble freckles.
After a while, we even took a little freezy pop break!
I love how it looks like Gracie is offering to share, and Maggie is pretty intensely involved in enjoying her treat!
Simply playing with water on the deck was a really fun, almost relaxing way to spend the morning...even if I was refilling the water buckets a lot!
And don't forget to enter to win the Scripture print from Naptime Diaries! It would look great in your kitchen or your bedroom or your bathroom or your living room or your...wherever! It will look great wherever you put it!
See what I mean? It would look great anywhere!
Have a happy weekend!
Leah love love double loves the pool!
Maggie and Gracie like to look at it...maybe dip their feet in.
But actually swimming in it?
Let's not get crazy here, folks. That isn't happening.
What do they love the most?
Playing in buckets and baby bathtubs full of water on the deck next to the actual pool, of course!
Enter our little activity.
Ah, yes, Simply Splashy! The alliteration nerd in me feels really happy about that :)
I glanced at a pin a while ago that had this general activity idea in it, so if you've seen it before, let me know and I'd be happy to give them credit!
All you need is a pan or a tub or something to hold water and a die.
On a side note, do you like my ghetto pan? I think this pan predates me actually knowing Aaron.
Moving on...I used a die that had colors on it: 3 sides are green, 2 sides are yellow, and 1 side is red.
I got it from this game:
You can certainly use a regular die.
Are you ready for the really intense directions? You'd better write this down ;)
Have the children gather around the pan of water.
Then take turns shaking the die. When a green side comes up (or whatever your predetermined number(s) is), the person who shook it gets to splash themselves with the water in the pan for 10 seconds.
They can even get wild!
You go girl! Pour that water all over yourself!
Once this game got old, we pulled out a bunch of Pretty Ponies, and they washed the living daylights out of them!
They were playing SO nicely,
that I took a few minutes to read!
You need to know how much I love John Grisham books.
I love them like bees love honey.
I love them like little girls love sparkles.
I love them like mommies love nap time.
So, yeah, that's a lot!
Anyway, Leah enjoyed splashing the bubbles around and giving herself bubble freckles.
After a while, we even took a little freezy pop break!
I love how it looks like Gracie is offering to share, and Maggie is pretty intensely involved in enjoying her treat!
Simply playing with water on the deck was a really fun, almost relaxing way to spend the morning...even if I was refilling the water buckets a lot!
And don't forget to enter to win the Scripture print from Naptime Diaries! It would look great in your kitchen or your bedroom or your bathroom or your living room or your...wherever! It will look great wherever you put it!
See what I mean? It would look great anywhere!
Have a happy weekend!
Subscribe to:
Posts (Atom)